How to use Telegram Bot for Contact Form
I have deleted my Facebook account for 3 months. Now I use Telegram as the main contact point. When building this “small universe”, I find out that I can use Telegram API for sending messages. A light bulb goes off in my head with an idea, using Telegram Bot for the Contact Form.
How it works
This feature may be too overkill for a simple contact form, I do it for the sake of learning and creating things. Let’s jump into building progress.
Telegram Settings
Bot
Creating a Telegram Bot is very simple. Telegram has another bot handling that process. Its name is BotFather. All I have to do is type some commands.
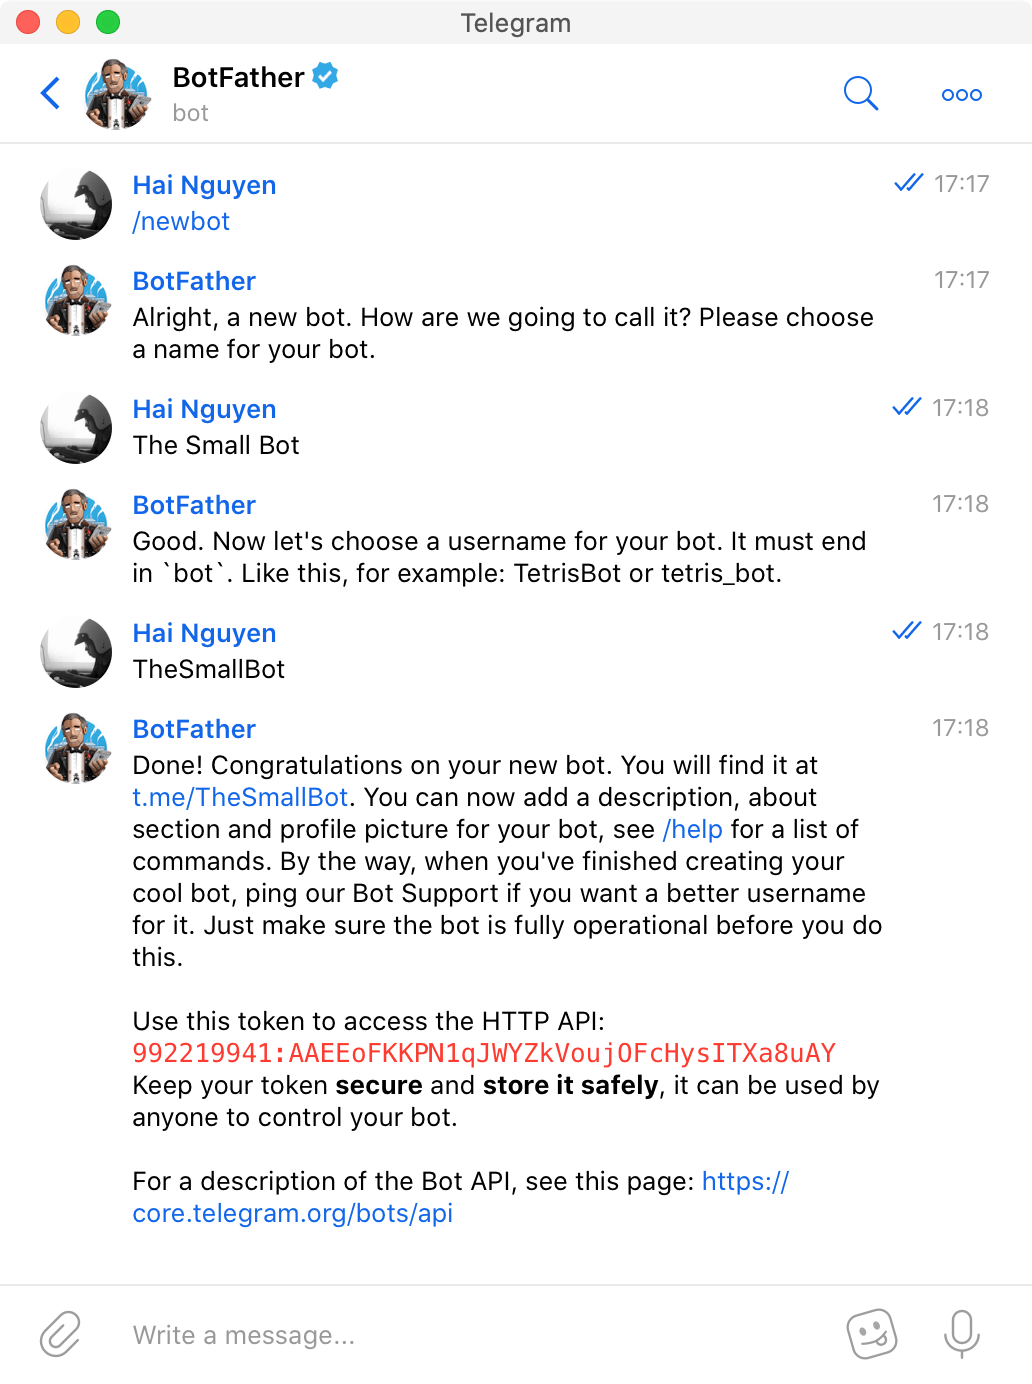
After creating Bot, I receive an authentication token for using the Bots API. It looks like 992219941:AAEEoFKKPN1qJWYZkVoujOFcHysITXa8uAY. I’ll call <token> from now on.
Group
According to the API documentation, I need a chat_id of a group or a channel. The main reason is that a Bot cannot send direct messages to a User.
chat_id: Unique identifier for the target chat or username of the target channel (in the format@channelusername)
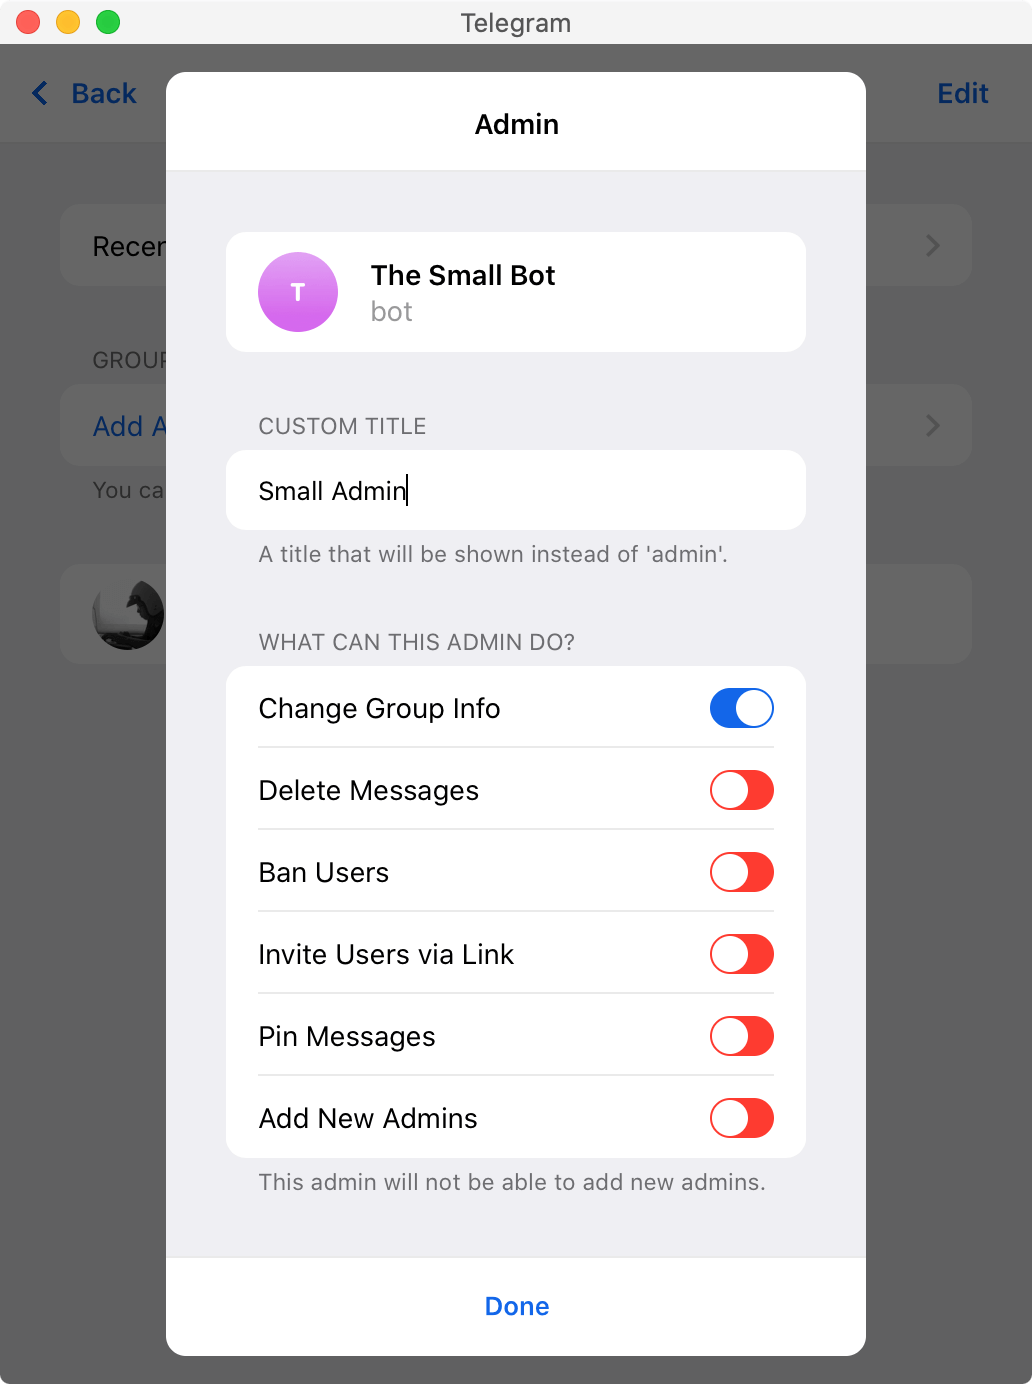
When I have created a group, the first thing to do is give Administrator permission to the Bot.
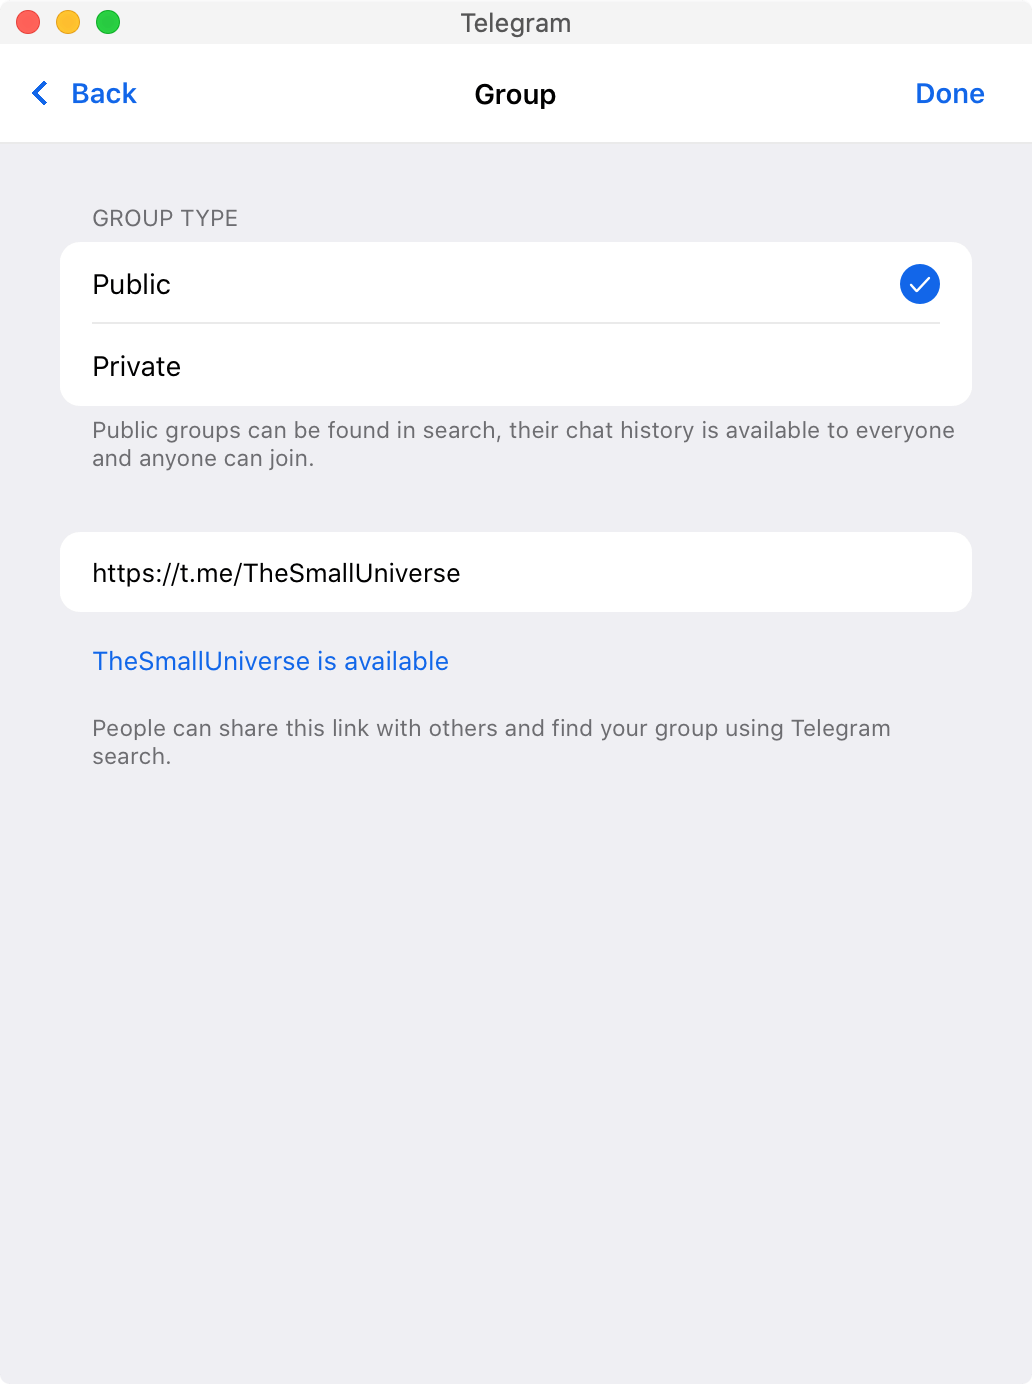
To find chat_id, I go to Group Type. A group is set to Private by default. It has a sharable link to join the group below, something like https://t.me/joinchat/<id>.
At first, I’m quite sure that the <id> here is chat_id, but when I put it into the API call, it fails immediately. After a lot of attempts, the only way to get the format @channelusername is to set Group Type to Public. So that I can have the group username as purpose. For me, chat_id will be @TheSmallUniverse.
Telegram API
Now I already have <token> and chat_id, the next step is to connect the API. Following the documentation, Send Message API is the only API that I need.
curl --location --request POST 'https://api.telegram.org/bot<token>/sendMessage' \
--header 'Content-Type: application/json' \
--data-raw '{
  "chat_id": "@TheSmallUniverse",
  "text": "Hello Darkness, my old friend!"
}'
And here is the response I get when running the command. There is a different detail, chat_id has changed to an Integer -1001258275042.
{
  "ok": true,
  "result": {
    "message_id": 5,
    "from": {
      "id": 992219941,
      "is_bot": true,
      "first_name": "The Small Bot",
      "username": "TheSmallBot"
    },
    "chat": {
      "id": -1001258275042,
      "title": "The Small Universe",
      "username": "TheSmallUniverse",
      "type": "supergroup"
    },
    "date": 1578890703,
    "text": "Hello Darkness, my old friend!"
  }
}
Contact Form
The configuration for Telegram is done. I need an UI to apply that functionality, and nothing better than a Contact Form.
User Interface
A meaningful message needs to have sender name, email and message content. As Telegram supports message formatting (Markdown & HTML), I come up with this interface.
On the client-side, I use Formik – a form validation library. When submitting the form, it calls an internal API, which is a simple serverless function.
Serverless Function
I use Next.js, which supports API Routes out of the box. If I don’t use Next.js, I could do this functionality with Zeit Serverless Functions or Netlify Functions.
The function looks like this:
export default async (req, res) => {
  const { name, message, email } = req.body

  if (!name || !message || !email) {
    res.status(400).json({
      ok: false,
      status: 400,
      message: "Missing required fields",
    })

    return
  }

  // https://core.telegram.org/bots/api#markdownv2-style
  const escapedEmail = email.replace(/_/g, "\\_")

  fetch(`https://api.telegram.org/bot${process.env.botToken}/sendMessage`, {
    method: "POST",
    headers: {
      "Content-Type": "application/json",
    },
    body: JSON.stringify({
      chat_id: process.env.chatId,
      parse_mode: "Markdown",
      text: `“${message}”\n— ${name} <${escapedEmail}>`,
    }),
  })
    .then((response) => response.json())
    .then((data) => res.status(200).json(data))
    .catch((err) => res.status(err.status).json(err))
}
During local development, I create a .env file at the root of the project directory. It contains environment variables values.
CHAT_ID="@TheSmallUniverse"
BOT_TOKEN="992219941:AAEEoFKKPN1qJWYZkVoujOFcHysITXa8uAY"
For production, I add these values to Now Secrets. They will be available at Build Time.
As I use Zeit Now service, all I have to do is config now.json file.
{
  "version": 2,
  "name": "The Small Things",
  "build": {
    "env": {
      "CHAT_ID": "@thesmallthings.chat-id",
      "BOT_TOKEN": "@thesmallthings.bot-token"
    }
  }
}
Then declare botToken and chatId in the next.config.js as environment variables.
// Use `dotenv` for local .env file
require("dotenv").config()

const nextConfig = {
  env: {
    chatId: process.env.CHAT_ID,
    botToken: process.env.BOT_TOKEN,
  },
}
Private Group
In my case, I don’t want to expose those messages for anyone in Telegram, so I set the group to Private.
At first, the Send Message API doesn’t accept @TheSmallUniverse as chat_id.
Because when moving group to Private, its sharable link has changed. So the old chat_id won’t be available anymore.
Luckily, I have the Integer chat_id from the previous API call.
{
  "chat": {
    "id": -1001258275042,
    "title": "The Small Universe",
    "username": "TheSmallUniverse",
    "type": "supergroup"
  }
}
Replace that value to .env file, the function works as expected.
CHAT_ID="-1001258275042"
BOT_TOKEN="992219941:AAEEoFKKPN1qJWYZkVoujOFcHysITXa8uAY"
But then, when I try to update Now Secrets for chat_id, I get this error
now secret add thesmallthings.chat-id -1001258275042
> Error! Invalid number of arguments. Usage: `now secret add <name> <value>`
That's because the secret value cannot contain the dash character. After searching for a while, I come across this solution.
At the root of the project directory, I create a chat-id.txt file, its content is the chat_id value.
Then update the command to use that file:
now secret add -- thesmallthings.chat-id "`cat chat-id.txt`"
> Success! Secret thesmallthings.chat-id added [762ms]
The cat chat-id.txt takes the content of the chat-id.txt file and pastes it into the command line for me.
And, what’s done is done. Now I have an helpful way to receive messages from anyone.